How to Print and Assemble PDF Sewing Patterns
UPDATE : We’ve now added a PDF test file that you can download and print in order to test your PDF print settings. Scroll down the post and find the “Let’s Test It With A Test Pattern!” section. We’ve also added details on assembling PDF patterns that require trimming of the pages, which we didn’t cover in previous versions. Ok, back to the post…
PDF’s? Argh! Computers! Printers! Sticky tape! Get me out of here!
If that’s your general reaction to downloadable sewing patterns, then we sympathise. Paper patterns are certainly easier to deal with. However, downloadable PDF patterns do have some advantages - for a start they are generally cheaper than paper patterns, you can download them instantly without needing to wait for shipping or pay postage costs, and you can use them as many times as you like - just re-print! (Shameless plug: We have our own collection of PDF patterns at Sussex Seamstress, though we offer paper patterns as well, because we like those too!)
So if you’ve never dipped your toe into the digital pool of PDF pattern printing - this guide is for you!
If you’d prefer to watch a video than read a guide, we’ve got you covered. Just click the video below and we’ll take you through all the steps. The video & this guide both focus on PC/Laptop, as it’s our recommended way to print PDF patterns. You can print PDF patterns directly from smartphone/tablet also, but we strongly advise against it. See our post printing pdf sewing patterns correctly from iPhone,iPad and Android for details why.
Also, this video was produced before the update covering the assembly of PDFs that needed trimming, so for that please scroll down and see below.
Printing and Assembling PDF Sewing Patterns from PC/Laptop
If you are reading this guide, we’re going to assume you’ve never done this before. Depending on how comfortable you are with computers, you may find some of these steps a bit basic, so feel free to skip straight to the sections that are relevant to you. We’ve written this guide to be as clear as possible for a relative computer novice to follow - so if it looks like a lot of steps, that’s just because we’re going to take you through it in plenty of detail - once you know what you are doing you’ll be downloading & printing PDF’s in a matter of minutes. Trust us, it’s actually pretty easy.
Before we start, a quick note: Because there are so many different PC set-ups, we can’t possibly cover all the permutations. We’ll be showing examples using some of the most popular applications, that means the Windows 10 operating system and the Google Chrome web browser. If you use a different browser or a Mac, then things may look slightly different on your system, but the basic steps will be the same. And since Windows and Chrome are both updated over time, things might even look slightly different since we wrote this post (I know - computers, eh?). OK, let’s get going…
Installing Adobe Acrobat Reader DC
The first thing you will need to do is download & install Adobe Acrobat Reader DC if you don’t already have it - this is FREE software from a reputable company, so don’t worry about installing it. Just search for “Adobe Acrobat Reader DC” in your web browser, follow the link, download & install it. You won’t need to do this step again.
Downloading & Opening a Zip File
Often when you purchase a PDF pattern, you will actually receive a file with a “.zip” extension. Wait a minute, you may cry, I thought I bought a PDF file? In case you don’t know, zip files are just a convenient way of packing up & compressing a number of different files all together, so that you only have one file to download instead of many. You can think of them as a bunch of different files, all put in a single bag.
When you download a zip file, either directly from a website, or by selecting “download” on an email attachment, you’ll see your browser start to download the file.
Your browser will show download progress & tell you when the file is ready. In Google Chrome you’ll see something like this at the bottom of your browser (in the latest version of Chrome this has moved to the top right of the browser):
UPDATE (Aug 2023): I know, these updates are a little tedious, but since this was written Google Chrome (and some other browsers) have started blocking downloads of .zip files (and soon .pdf files) by default and warning that they are “dangerous” or “potentially malicious”. This doesn’t actually mean there has been a virus detected, it just means that such files CAN contain viruses or other threats, so the browser has blocked the download (this is a “safe browsing mode” feature). So long as you trust the site you are downloading the file from, if you get this message, head to the list of “downloads” in your browser (in Chrome you can get to this via the 3 dots menu in the top right), and you’ll have to select the file and tell the browser to download it anyway (in Chrome the option is “keep dangerous file”). Ok, back to the post…
To take all the files out of the zip “bag” we need to extract them. Fortunately this is dead simple!
First, we want to find where the zip file has been saved - it’s probably in your “downloads” folder.
Just right click on the file in the browser and select “show in folder” (on Mac it will read “show in finder”, because they like to be different over there). Or you can go to your downloads folder directly and find it there.
At this point you may like to copy the file to some other location on your PC to make it easier to find in future, but it’s not essential.
If your download is a PDF instead of a zip file, you can skip the next part.
So how do we get the files out of their zip bag?
Right click on the filename and a menu will appear. From this menu, select “Extract All”. (Note: Depending on your Laptop/PC’s set up and operating system version, you may not see the “Extract All” option. If not, you may find you can access the files by simply clicking on the zip file. Alternatively, you can download free programs to extract the files, such as WinZip).
And there are our PDF Files! Great! Now, to print them…
Opening a PDF File in Adobe Acrobat
Exactly what files you receive and what they are called will depend on where you purchased your PDF. The example above is a pattern from www.sussexseamstress.com.
The first file is the instruction booklet - you can just print this using your normal print settings, most internet browsers will let you print a PDF directly, or you can use Adobe Acrobat Reader. The rest of the files are the pattern files themselves.
At Sussex Seamstress, like many other pattern stores, we provide the patterns in multiple paper formats, to accommodate people in different parts of the world. If you are in the USA you’ll need the US Letter files, in most of the rest of the world you’ll need the A4 files. Don’t worry about the A1/A0 files for now (if you’re interested, see our post: Printing PDF Files without a Printer for an alternative to printing at home). If your pattern is fairly large (like a dress or long skirt), you may find there are multiple A4 or US Letter files. You will need to print all of these files to print the whole pattern.
Ok, so let’s take a look at an A4 file. Open Adobe Acrobat Reader and select “Open” from the “File” menu. Then navigate to the location of your PDF files (the “downloads” folder if you’ve not moved them) and click on one of the A4 PDF files. (alternatively, if you already had Adobe Acrobat Reader installed and have it associated with PDF files, you can just double click on the PDF file in the folder rather than opening Acrobat first)
When Acrobat opens you’ll probably see a screen that looks like this:
If the main screen area looks blank after loading the file - don’t panic. Acrobat Reader can sometimes be a bit over-zealous with its default zoom settings, so you are probably just zoomed in on a blank part of the page. To fix this…
Just select “Actual Size” from the zoom menu at the top of the page.
You should then be able to see more of the page. This is the pattern! If you scroll through the pages you’ll see all the pieces of the pattern, split up across multiple pages that are the correct size for your printer paper. We are going to be printing all of these pages & then taping them together to make the completed pattern. Yeah, it’s a pain, but we’re here for the benefits - just stick with it!
Selecting the Correct Printer Settings for PDF Patterns
Ok, so far all we’ve done is download & open our PDF file. If you’re pretty good with computers, you probably skipped that whole section (welcome back!). Now we come to the part that you really need to get right. It’s not difficult, but you do need to make sure you set up your print settings as described below otherwise you may end up printing your pattern at the wrong scale.
Fortunately there is an easy way to check that our printing is correct. Let’s take a look…
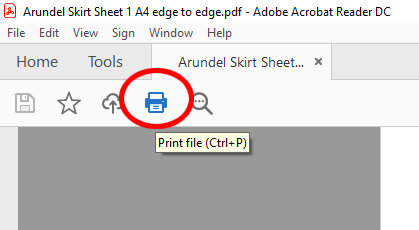
First, select the print icon in the top left of Adobe Acrobat.
This will bring up the print settings window shown above. First, we need to check the basics. Check that your printer is selected from the drop down box at the top of the window, then check that you have the “Size” setting selected in the Page Sizing and Handling section. This will allow us to set the scale of the pattern pages we are going to print.
Next, we need to set up the printing such the pattern prints correctly. Unfortunately, the default settings will not be what we want. It will probably default to “shrink oversized pages” and “print on both sides of paper”. We don’t want either of these things! So, instead select “Actual Size” from the scaling options and deselect “Print on both sides of paper”.
If you’ve been through this process before, that’s all you need to do - you’re ready to print. Hurrah! However, if this is your first time printing a pattern or you’ve changed your printer settings since last printing one, then we need to check the settings of the printer itself (yep, that’s a different thing - computers, eh?)
If you click on the Properties button next to the name of your printer, this will open the printer properties window.
For me, the window looks like this, but it will look different depending on the make & model of your printer. The main settings you want to look for in here are anything related to scaling. Many printers have a “fit to paper scale” or “scale to fit paper” option that is “on” by default. You need to switch any scaling options off in these settings. Check in the Advanced tab also, as sometimes they are hiding in there. If there is not a straight “off” option, then set scaling to 100%.
Ok, you’re done. You shouldn’t need to mess with these settings again.
Printing the Test Square
So, you may remember that I said there is an easy way to check that all of the printer settings are correct. The way we do this is to print the Test Square. This is a square of a known size that we can print & then measure to check that the size is correct when it comes out of the printer. Usually these test squares are on page 1 of a PDF pattern, but not always. Simply find the page with the test square on it & print that page. (NEW: We’ve added an update to this post that provides a test file you can use to check your settings - see the next section below).
To tell Adobe Acrobat to print just the one page, go to the “Pages to Print” section, select “Pages” instead of “All” and then type in the number of the page you want to print into the text box. In the example above, the test square is on page 1, so we type in “1” in the text box. Then just click the “Print” button in the bottom right and your test square will print. Fingers crossed!
So take the printed test page out of the printer & give it a measure! It should be exactly 10cm x 10cm. It’s possible that it will be very slightly off as home printers are not 100% accurate when printing to scale, but it should be no more than 1mm either way. If you find that it is significantly far off the correct size, then go back and check all of the print settings. If anything is wrong it is most likely in the printer Properties. But hopefully, all is well & we can now print the whole pattern with the confidence that it will print to the correct scale.
Just pop back to the Pages to Print section in Adobe Acrobat and set this back to “All”. Then just press the Print button in the bottom right and the whole pattern will print. Exciting! And the good news is we’re all done with the computer. It’s all analogue from this point on…
NEW: Let’s Test It With A Test Pattern!
Before you try printing an actual PDF sewing pattern, we thought it would be useful to create a test pattern of just a few pages that you can print to check your settings and make sure everything is set up properly. Here are a couple of links where you can download the test pattern, just select the version that matches the paper size you are using: A4 PDF Test Pattern, US Letter PDF Test Pattern.
Try printing the PDF test pattern using the settings you’ve set up above.
Lay the 4 sheets together as shown below.
If your print settings are correct, you should see a pattern like this (the image shows the A4 pattern, the layout is slightly different for the US Letter version due to the different paper size). The important things to check are the 10x10cm test squares. Measure these with a ruler or tape measure, they should all be 10cm by 10cm. As printers aren’t perfect they may be out by 1mm or so, but they should be very close to 10cm. The second thing to check are the diagonal lines. These should flow nicely from page to page, as shown, with no kinks or misalignment. (The white gaps are normal, this is just because most printers don’t print right up to the edge).
Hopefully your test pattern will look like this. If things are not set up correctly, you may find that the pattern prints something like the image below.
The above image is an example of print settings being incorrect. In this example the printer is scaling the pages instead of printing them at the correct (actual) size. You can see that measuring the 10cm x 10cm test square shows it to be much smaller than 10cm (in this example, 9.5cm). This means the pattern is being printed too small. We can also see that the diagonal lines do not flow nicely from page to page and are instead misaligned. If you find your test pattern prints like this, then it’s time to check all the settings as you won’t be able to print patterns correctly with your settings as they currently are.
If there is one thing to remember when you get into printing PDF patterns, it’s always measure the test square. Depending on the type of pattern you have, the pattern may sometimes even look correct, when in fact it is being printed at too small a scale.
Ok, let’s get back to assembling an actual pattern.
Assembling the PDF Sewing Pattern
Before getting the sticky tape out, its worth just laying the pattern pages out on the floor.
The pattern pages will come out of the printer in rows or columns (depending on whether it was printed landscape or portrait). Simply lay the pieces out next to each other to get an overview of the whole pattern. You may find that the instruction booklet contains a picture showing how the pages should be laid out, and you may also have additional information on the page to help, e.g. at Sussex Seamstress we add watermarks to the pages that indicate their position - A1, B1, C1, A2, B2, etc. These are not shown in the image above.).
Now that you know how it all goes together, it’s time for the sticky tape!
Exactly how the pattern is assembled will vary depending on where you purchased it. Sussex Seamstress PDF patterns are printed edge-to-edge and you’ll also find some other companies selling PDFs in this format. This format means you simply need to line up the edges of the paper as shown above & stick them together. That’s it! You’ll notice there is a small blank area at the margins. This is normal, we make sure we don’t put anything critical right on the paper edges, so it won’t affect the pattern.
However, we know some people prefer the PDF’s that require trimming the paper (we’ve started to provide these as an option on our newer patterns), and you’ll commonly find this kind of PDF from many other pattern companies. So let’s take a look at those, as assembling them is slightly more work.
With PDF patterns that require trimming, you will find cut marks at the corner of the pages. These indicate where the pattern needs to be aligned with the pages next to it. What these cut marks look like can vary a lot, but typically they will contain vertical and horizontal lines that need to be lined up with the corresponding lines on the adjoining pages. Sometimes they look like crosshairs.
There are multiple ways of assembling these kinds of patterns, but the neatest is to trim the paper along the cut lines. To do this, it helps to use a ruler to draw a straight line aligned with the cut marks.
You can do this on every side of the paper, cut along the lines, and then join the whole pattern edge-to-edge as in the edge-to-edge patterns, and you’re done. However, there is an alternative.
If you want to cut down on the amount of paper trimming you need to do and make the pattern a little more sturdy, you can just cut down 2 sides of the paper (e.g. right & bottom side) and then overlay the cut edge onto the uncut edge of the next paper piece.
Align the pages carefully, using the cut marks and the pattern lines themselves as a guide. You should then get a nice clean join as shown above, and the little bit of paper overlap should make the pattern a little stronger.
So finally, we cut out the pattern pieces as you normally would. By all means add some extra tape if you need to so that the piece is secure enough to pin to your fabric.
Final Thoughts
So, there you have it, all the gory details of PDF sewing pattern printing. If all that seemed a bit much, just remember we took you through every step from scratch (as well as trying to keep you updated on the latest tech changes).
When you’ve done this once or twice, you will know what you are doing. When we print PDF patterns (which we do!), it’s really just a case of loading them into Adobe Acrobat Reader, selecting “Actual Size”, switching off “Print on Both Sides”, and then clicking “Print”. That’s it! There’s just a bit of leg work to set things up first time around and get used to how all the tech works.
Don’t forget to check out our selection of PDF Sewing Patterns (size 6-30) or if all this has scared you - maybe just the Paper Patterns :)
Happy sewing!
Sussex Seamstress is an independent pattern maker, based in Sussex, UK.
While you’re here, why not take a look at my range of sewing patterns for women?
